Day 3: Nature Faces
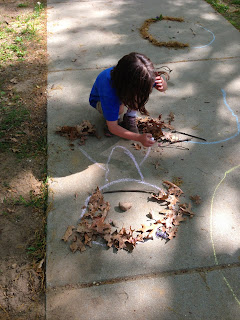
While I'm sure there are many more ways to do this, I've done Nature Faces two ways with the children around me. A simple way is to just draw a chalk circle and make a face with whatever found options we encounter on our walks. This looks like a pirate! ARRGH! Each child interprets it differently and the "loose parts" are always different seasonally. Sometimes acorns are mouths, other times a curved stick makes a great smile.
Other times, a whole body is added, leaves are used for hair, and roots are a pony tail. The options are endless! I like to give children time to work on their individual face and then take a "tour" of all the faces, just as we might in an art gallery.
Another option for Nature Faces is to use clay. I purchased a block of clay with a coupon for about $6 at one of the big box craft stores. I find that each person doesn't need too much clay for an impressive face.
Natural elements can be brought in, such as leaves, weeds, and sticks. Also, using unique features on the tree itself as a mouth or other facial feature can be a good strategy. Sometimes, I see faces on trees without needing to use clay! What I love about these is they easily become part of the natural landscape by being recycled on their own. Each face is unique! To extend this, I might talk about the types of trees, why bark is important, where clay comes from, etc.
Another way to make "nature" faces is through this game, About Face Card Game Activity . There are many, many pieces with natural (and other) facial features. Put them together to make a new funny face each time. The game gave me inspiration for additional natural facial features, too. Love this dried flower nose!
If you need inspiration of terrifying nature faces, check out some faces here. Feel free to share pics of your nature faces!


