Sunday, January 31, 2016

The DoSeum: San Antonio's Children's Museum

We love going to museums, so try to visit as many as we can while we are traveling. We used our membership to the Museum of Science and Industry in Chicago (Groupon deal!) to go the DoSeum for free! There was even free, convenient parking. The concept of the DoSeum, is to DO things and be active participants in what we encounter. We had a delightful day at the museum. As we approached the building, we were greeted by Learn, Explore, Create--what a great motto for life! The website says it's "the only children's museum just for kids where you learn by doing, creating and tinkering--instead of just looking and listening." These are sound educational principles! Having just set up a tinkering space in our own house, we appreciate visiting places we can visit that allow us to DO things!

Attractions inside varied. There was a huge wind tunnel you could actually go inside, with various fabrics to try them out in the wind. The butterfly wings and kites were cool, though they really just liked all the wind! There was also a large screen that senses where your body is to interact with the scenario. In this screen, our arms became large birds finding food. I assume they can change out the screen to keep the area fresh. 


It was interesting to see their "snow" as we are typically used to plenty of snow in northern Indiana. This open invitation included simple cotton balls and tape. Changing things up slightly like this gives additional ways to interact. Additionally, they had white soft balls that served for snowball fights. When there isn't snow around, you learn to get creative, right? 

The outdoor space was inviting with some adventure, such as this rope bridge. The youngest did great on it. 


There was also a huge "water table on steroids" equivalent. My youngest would have been here the whole time if he could have, even though the water was closed down, perhaps for the season. There were balls, boats, and many ways to explore how water works. 


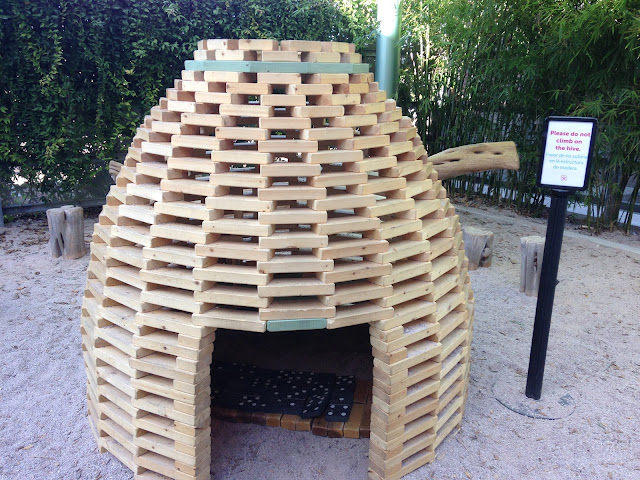
This was part of the climbing fort. I love seeing lots of wood. Additionally, there was whole section of logs at various angles to climb. They had fun, despite the funny faces! One thing I missed in this section was loose parts. I'm a huge proponent to loose parts and love to see opportunities to build, create, and make something new in the environment. 


There was a small hill, plants, and trees nearby. The grass was artificial--wonder if it's hard to grow there or it just gets too much use there? 


Inside, the museum had a whole are for younger children to promote dramatic play. The airplane allowed you to be captain, passenger, baggage handler, etc. It was interesting to see how much they enjoyed doing x-rays on the luggage! Simple props like a captain's jacket helped facilitate the play. In the veterinarian's station there were several ways to investigate the animals in their care, such as stuffed animals, cages, clipboards with patient sheets, band-aids, scrubs, and more. They also had a little post office, construction area, grocery store, eatery, gas station with car, etc. This was all enclosed with an attendant at the front so kids didn't wander off on their own; however, all the children I saw were actively engaged with all the options for dramatic play! 


Another section for the older kids included Spy Kids--learning how to be a spy. They learned secret codes, storytelling, geometry, problem solving, and more.

Another exhibit focused on light and sound, with some homemade options using found objects and mallets to create interesting sounds. The whole exhibit (not much is pictured) allowed you to be a DJ mix master and see how sound affects and interacts with us, even the sounds of nature. You could use mirrors to manipulate light, too.


On the other side of the building was a cool tree house with nearby gardens and "stream". There were plenty of plants and inviting spaces to enjoy the outdoors. You could wade in the stream, sail boats down in, and more.

Our kids kept trying to make dams (it was his science fair project, too!), but I don't think they were very effective. Glad there were some loose parts in these areas. 


The whole area was aesthetically pleasing and designed with children in mind, giving safe places to explore. 


The sand pit with conveyer belt was another favorite!


Upstairs had a tinkering space, called Innovation Station. Love the name! The website describes it as, "Children are encouraged to evaluate, try, fail, re-evaluate and try again. Innovation Station appeals to multiple types of intelligences and eschews lengthy instructions for more intuitive learning."
Yes! We loved the wind tunnels--we need one of these closer! I've been investigating DIY options, but haven't been able to source the acetate to make one yet. I like how they included the design process. 


This whole area had lots of loose parts to try various options in the wind tunnel and/or to build something with blocks. 


There were also options to try ramps and balls. You could change and tinker with the options. 


There was more! They had areas with tables so different activities could be put out for special events or themes. There was a large room with maps (including huge state pieces to put together!) and ways to interact with our global outreach. There was a video screen hooked up to a museum in Mexico where we could use a white board to talk to someone there. My Spanish skills came in handy! ;-) There was a multipurpose area that was used for snowball fights and an icy wonderland, but it was closed when we were there. I assume they change what is here often. There was also an imaginative area that had "caves" and "nests" that left lots to the imagination. This also could easily have costumes and such changed out for a different feel to the space. There was a section with tubes and balls the children enjoyed manipulating as well. It's great visiting spaces that help us Learn, Create, and Explore! 

Sunday, January 24, 2016

Woodpecker Wham! Activities

I did a series of programs with different audiences over the weekend on Woodpeckers at Woodlawn Nature Center. Can you believe there is not much out there as far as teaching aids to use with woodpeckers? Believe me, I hunted to find what I did! I also created a few things, too. If you use any of these ideas, feel free to let us know!

I have mentioned the book Woodpecker Wham! by April Pulley Sayre various times in the past. She has great nature books for children! I was inspired by this book to create these experiences. It was great when she gave us a shout out on Facebook as "creative and passionate" people make her book come to life. See my review of the book here and a related blog post about Woodpeckers in our area. This gives a good overview and links to resources with more information about woodpeckers. I reviewed these to make the woodpecker clues and to have information to share at the presentations.

I hosted a few programs:

  • Nature Play--activities available if people wanted to use them, I read the book if someone is interested and talked about woodpeckers while children played and created.
  • Woodpeckers in Winter--developed a PowerPoint of the woodpeckers in our area, sharing information on identification, behaviors in winter, how designers look at woodpeckers for inventions, attracting woodpeckers to yards, deterrents from woodpecker damage, and quizzing the participants with the use of woodpecker clues.
  • Family Nature Club--read the book, short run through the PowerPoint to identify woodpeckers in our area, guided hike looking for signs of woodpeckers, good woodpecker habitat, brought puppets and clues to test woodpecker knowledge on our hike. Inside once again, stations were set up to reinforce what we learned about woodpeckers. 

Printable Resources I Created:
Woodpecker Puppets or Matching Cards
Woodpecker Clues

Here are the stations I set up:

Puppets and Matching Cards--I printed out (see printable above) two sets of the woodpeckers in our area, cutting them out and laminating. One set was taped to paint sticks for puppets. The others were for matching with our woodpecker clues (see printable above). We found the woodpeckers in the book, used puppets during the PowerPoint presentation to match with the clues, took the puppets on our hike to reinforce the concepts, and used the puppets for PLAY! Play is always an important concept for learning. See a related post on using play to learn about animals here. The woodpeckers even found wood for drilling.


Build a Woodpecker--Provide "loose parts" to build woodpeckers. I brought in Magformers (a favorite in our house--actually my husband's toy!) and a basket full of shells, nuts, golf tees, and other natural materials. Can you see a woodpecker in these examples? We used the puppets as examples, so we could pay attention to the shape, coloring, etc. This could be much more complex if desired. What I love about loose parts play? No artwork to store or recycle! See my post on resources and quotes about Loose Parts Play. I even have a Loose Parts Play Facebook group if you'd like to connect with others around the world using Loose Parts Play for learning. 


Fold a Woodpecker--I found an origami guide sheet to make woodpeckers! It's pretty nondescript, but offers another way to connect to woodpeckers. We build many skills by following the directions, making precise folds, etc. I used to teach elementary school in Japan--glad we could make cross cultural connections, too. 


Reading and Coloring--I had Woodpecker Wham! and Vulture View (by the same author) out on a table with coloring sheets, information sheets about woodpeckers from Birds & Blooms magazine in sheet protectors, a quiz from B&B, a poem about woodpeckers, and bird observation journal sheets.


Craft a Bird--A volunteer (thanks, Annie!) had an idea to make paper birds like this. She cut out the various pieces after creating a pattern, figured out feet with twisty ties (cool idea!), and


Extension Ideas:
  • Build a woodpecker nesting box
  • Make homemade suet to attract woodpeckers
  • Use props (such as goggles, a bill, etc.) to show unique adaptations of woodpeckers
  • Create action cards from the various woodpecker action in the book to act out while on a hike or during story time
  • Find a readers theater to share about woodpeckers
  • Read traditional stories about woodpeckers, like Hiawatha
  • Share videos of woodpeckers in action--maybe have tablets with some preloaded to view
  • Use the Identiflyer (aft link) or an app to learn the calls of different woodpeckers
  • Print large pictures of the birds, using yarn to create a "sign" of each one. Place the picture on the child's back. Play 20 questions around the room, asking others questions to figure out the birds. This can also be done with the animals and info sheets in folders to discuss. 


Here are a few shots from our guided hike. We had a great family of girls who are always outside and a new family of boys that obviously have a lot of experience in nature. I was glad I could still share a few things to help extend their experience, too. :-) We found good habitat for woodpeckers, talked about what they eat, and the kids actually found 2 woodpeckers--a downy and a red-bellied! That was neat to see them in action! 


It was a beautiful day to be outside and we could have stayed outside for longer!


It was neat to see the kids building woodpeckers and such after we came back inside after the hike. They were really getting into their building, creating woodpeckers (left), complicated bird houses with several levels (picture on the right), and more! 


They had lots of fun!


Sunday, January 3, 2016

The Thinkery!

We love visiting museums! While on vacation (working for me--my job is portable with a laptop!) in Texas recently, we stopped by the Thinkery in Austin. It's a fairly new STEAM museum which was formerly the children's museum of the area. We were able to get in free with our ASTC reciprocity from the Museum of Science and Industry. Added bonus! Since our Christmas present theme was "tinkering" we thought this would be a perfect place to explore with the boys!

There were many hands-on stations throughout the museum. They also had seasonal gingerbread house making, including a high tech version. It looked like many signed up for this extra at the museum. Since this was our first visit, we thought the visit would be enough. We liked these simple blocks with velcro. They allow for different uses than normal blocks. The gears were fun, too. We have a couple of gears toys at home--maybe we need to get them out again soon.


There were circuit boards to control wires, lights, sounds, etc. 

One of the kids' favorite spots was with the "rockets". They had animal shapes on them and various wings--loved these as it brings in a little nature. They are put on a compressor and shot off, with ways to change the trajectory. The different rocket designs also impact how they go as well. 

The kids thought clean up time was just as much fun! I like that we have raised them to pitch in and help when there is a need. If you make a mess, clean it up. (okay--still working on that one in the home!)

I didn't see them used much; however, I like that there were record sheets nearby to turn it into a real experiment if desired.
We also loved the wind tubes! Even my husband got into it! I have been looking for a good source for one of these (maybe not museum quality), watching the options at Kodo Kids and also looking at the many different options that are available as far as making one on your own. Still pondering on this! It would be great to study wind, cause/effect, seed dispersal, etc. 

My husband also was mesmerized by the iron fillings suspended in oil and the different patterns and shapes they made with the magnets! The ball shoots with air flowing through them were also fun!


Outside there was a water play area, a large climbing area, and various play areas. 

 
Nice places for shade and privacy!
We're always up for a climbing log!
I've been looking at the plans for these beehives for several years--maybe it is a sign that we need to get something made!

There were also tubs of various loose parts and toys outside, like large dominoes and "snow" balls! A music area was also fun! 


We were really looking forward to the Maker Space they have at the museum. They only had afternoon hours that day, so we planned on an afternoon visit. We thought it might be more open ended (though the attendants were open to the projects the kids might want to make), but it was nice to have a theme on circuits for the 45 minute session. They talked about making a complete circuit, using words like circuit, conductor (like water, metal), closed loops, resistor, insulator, etc. I always like to see how they organize and set up these experiences (teacher geek in me). They talked about how this is a hands on project, how there might be some challenges or mistakes, and how to learn from what they are doing. They used laminated name tags with dry erase for the names. Also, the planning sheets later on were dry erase. In the picture below, they are closing the loop to make a circuit, using their bodies as part of the loop. They made a big closed loop with all the kids in the class! The ball lights up when the circuit is closed. They talked about examples of insulators and conductors. A wood table might be an insulator; however, a live tree conducts water inside. A wet t-shirt would also conduct electricity. They also shared a safety caution as they would use small batteries which are unsafe for young children if ingested. They gave the cards to the parents so no batteries would be lost within the museum that had 525,000 visitors in its first year as The Thinkery.


They were show an example of what they might do, but then were given lots of options and loose parts to make their own design. 


Supplies were out on the tables, ready to go. 


There were also experts who had used these materials many times that could help if they got stuck or to help understand the material better. 


It was neat to see their finished designs with blinking lights!

Nearby were several fun books related to tinkering! Lots of inspiration! 


Outside of the Maker Space, they also had circuit boards for use. Love these! They remind me of the littleBits we recently got. It's fun to try different options! 


Some areas were creative areas, with instructions for snowflakes and a place to add to the big gingerbread house! Fun! 


Other areas had different loose parts to build and construct things, with an invitation to make a sleigh during the holiday season.


They had an animation station, a scope, and a whole room on light that I didn't capture with pictures.

Upstairs, they had a whole toddler area that looked inviting! We were busy with other projects and didn't make it upstairs for long. 


There was also a kitchen lab for special projects--that could be neat! 


They had local food outside, as well as healthy vending machines--win! There was also a gift shop as you left--while a small area, there was a lot of super cool stuff in it! Since we got in free, we let each of the boys choose something inexpensive to buy, while my husband decided he needed magnetized blocks! While the museum is not huge, we had plenty do during our afternoon visit. There are many classes and things appear to be changed up over the seasons. It helped us think and connect to STEAM concepts more! 


I liked the big chalkboard in the museum with a question of the day and notices about the day! Fun!