Showing posts sorted by date for query Woodlawn Nature Center. Sort by relevance Show all posts

Sunday, April 3, 2016

Low Cost Outdoor Classroom Alternative Tips

Outdoor Classrooms provide a place for children to connect to nature. With so many areas where children are told "no" to the diverse ways they want to interact with nature, outdoor classrooms are often a "yes" place. Yes, please dig in the dirt. Yes, please dig with the log pieces. Yes, please climb on these fallen logs. I was introduced to the Nature Explore outdoor classroom concept as we developed a natural playscape at a local nature center. This research based process helped reign in all the possibilities and gave me a framework to actually get this area done!  Their Learning with Nature Idea Book is essential to getting started. It contains the guiding principles, theoretical framework, and needed elements for certification with a Nature Explore Outdoor Classroom. Certification is worth the extra step! If you work with youth in Indiana, the intent is to make this part of the library with the Indiana Youth Institute so that it can be checked out for free. However, I think the $20 investment is worth the money for the simple concepts and framework presented. To help make these spaces more accessible, I share tips below for lower cost alternatives.


As you get started in the outdoor classroom, look for what you already have that can be repurposed or used for the area. For example, at Woodlawn Nature Center, we already had a water feature. Many volunteers and donations helped with that in the past, though upkeep and maintenance takes time and some money. It's a great place for children to watch the fish, observe animals drinking, and to look for other habitat signs. We added a few benches made from wood on the property. A chainsaw artist who grew up in the area made them when he was home visiting. Additionally, there was already a campfire area with logs for sitting. This became our gathering area. What spaces do you already have that might be repurposed into an area in your outdoor classroom?

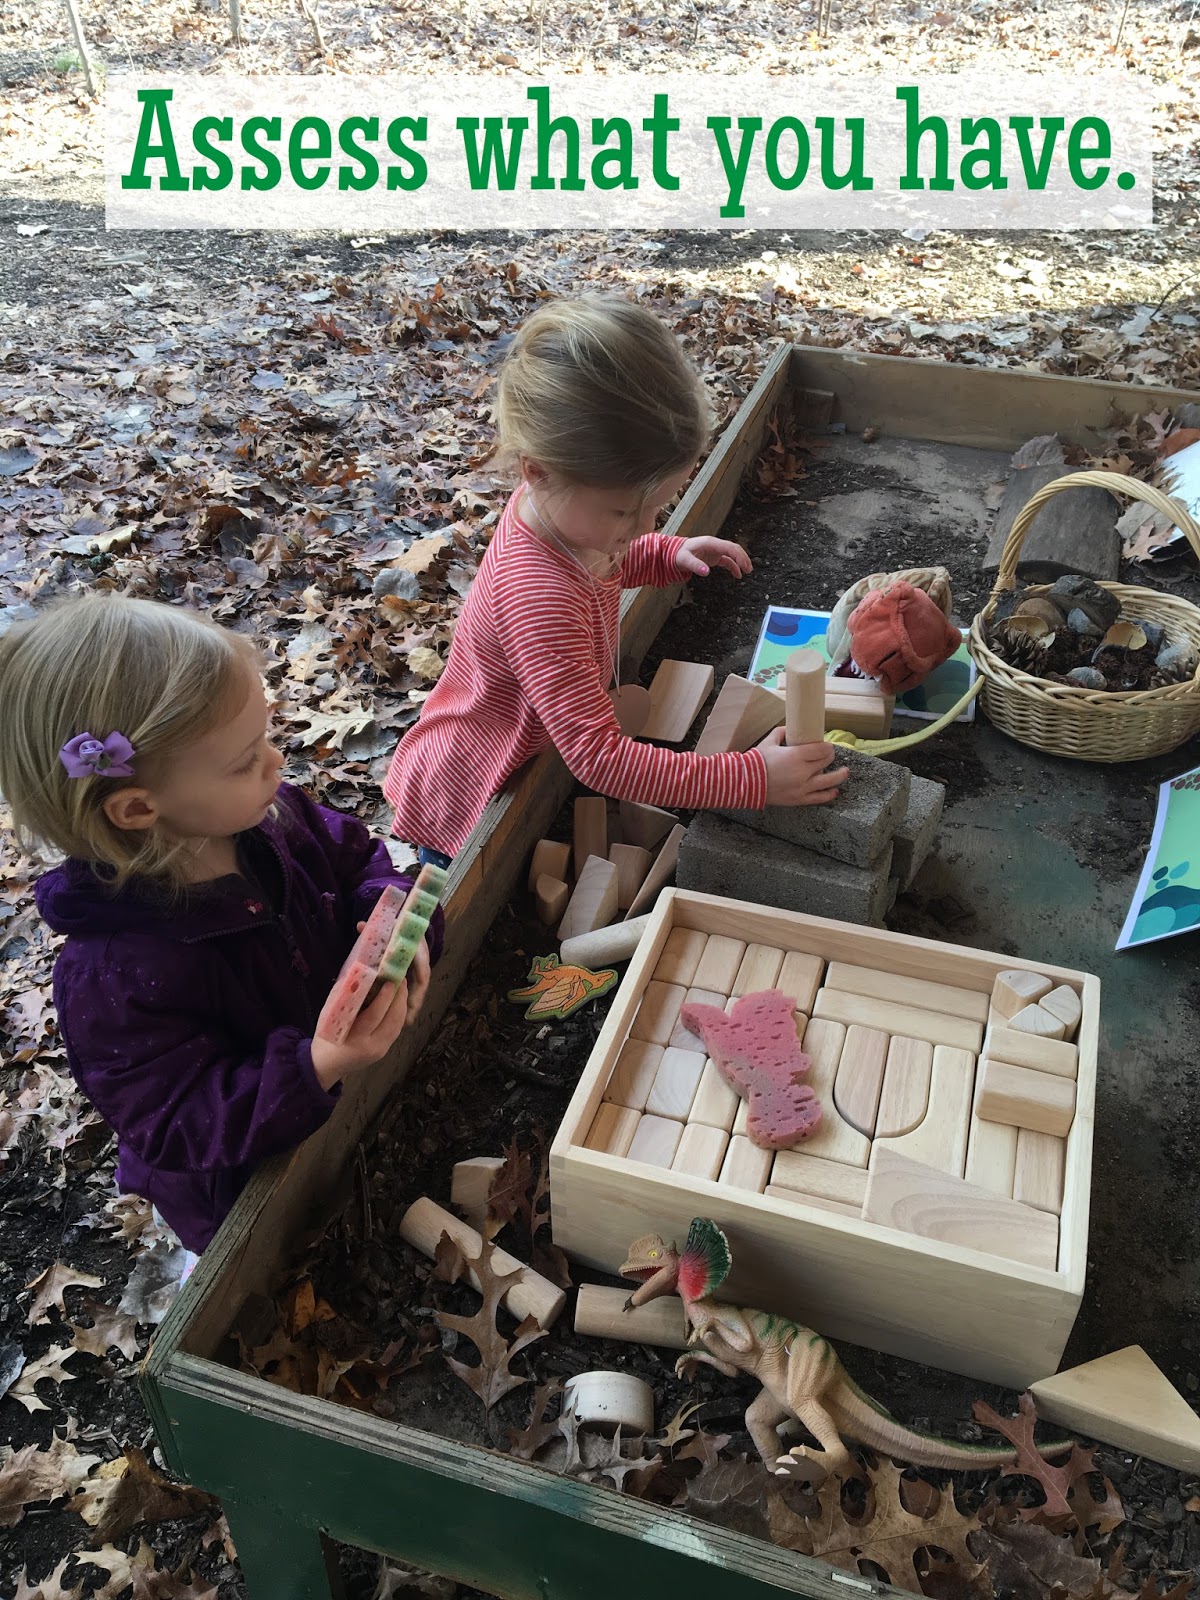
We also started looking through the basement and other areas of the nature center to see what might be used or repurposed. We found this low open table with sides. It is slightly slanted, but okay enough to be a building base. We put it behind our building under the overhang. It doesn't need as much protection being under the overhang. 

We also found many loose parts throughout the center that could be repurposed for outdoors. We gathered baskets, pinecones, sweet gum balls, etc. for use in the outdoor classroom. We store much of it in our "Loose Parts Play" area inside and then take outside as needed.  I also helped a friend nearby get ready for her certification. She has a beautiful outdoor area that just needed a few more pieces for a music and movement area as she didn't have official built in pieces outside. She had a great open space for it though. Going through her indoor storage areas she had great scarves, hula hoops, and smaller musical instruments. These could easily be gathered in a large basket to have the available in this area. What can go outside that you have inside? 


My children were part of a Pay It Forward 4-H club. I love how they focus on teaching service and connecting with others. They toured the nature center and decided they would like to help with a music wall. The children brought in items that might be used for music, such as old xylophones and other metal items. They put in the upright poles, added collected branches from the area, and screwed in the items to explore. Thanks PIF 4-H! As mentioned above, a chainsaw artist, Mark Harris, helped with some benches. Additionally, we received a grant as the nature center to buy a chainsaw to make other benches. 

We received funds from local Optimist clubs and then the New Paris boy scouts group came in and put together our boxes. Girl Scouts helped clean up the area and added new seasonal plants. 

My husband knows that one way I feel love is through acts of service and spending quality time together. He has "given" me a few mornings of his time as birthday presents the last couple of years. His help might include using a post hole digger to add poles, building an art easel, sawing legs off a table, etc. I try not to abuse it, but his help comes in very handy when I have a vision of what I'd like to see done. 

I LOVE seeing various ideas for outdoor play area. In particular, I love the kodokids.com, natureexplore.org, the Adventurous Child Playgrounds, and Natural Playgrounds. I also pour over websites, such as Pinterest, for other ideas. Check out some of the boards I have to start your search. I have boards specifically on Nature Explore Outdoor Classroom "areas" as well as lots of boards on Loose Parts Play--infants and toddlers, storage, natural items, etc. My main board for outdoor classroom ideas is WNC Natural Playscape.

I cannot generally afford all the items I would love from these catalogs (though buy select items I can't get otherwise); however, I can use them as inspiration for safe DIY versions of the items. For example, I usually see the clear easels for around $1000 with additional shipping. We had some grant money and were able to build our version for just around $250. It took a morning with my husband, plus some time figuring out what we would need and finding places for supplies. Here is a basic tutorial we based our plans off. We chose to make our easel longer as that was the size of acrylic we could find easily at our local home improvement store. 

I also LOVED the ramps I was finding various places for exploring in our messy materials area. These were $250-300 for a set. My friend has a handy husband. I showed them to him and he thought they were something he could make. For about $30 (plus a willing helper who has lots of tools), we had at least two larger sets of the ramps only, using pieces of logs and tree cookies to help position the ramps during play. Find our tutorial here. These have added a great dimension of engineering, math, and STEM concepts in our outdoor classroom. 


We keep our ramps inside in a crate near the back door. We can easily bring them outside when we want to use them. 

This is our nature art area. As we put this area together, I found a table on the side of the road. We cut the legs down so it was a shorter table. Our neighbors were having tree work done, so I asked for their stumps. The garden mirror came from a local resale type shop for $2.50, the cork board from a garage sale for $1,  and the easels and metal decoration were unused in my garage. By "scrounging" we came up with a basic area that we could add to as needed. Total cost--less than $5 and time gathering items. 
I'll share another picture of this concept soon. A friend finds plastic and wooden crates behind a local Mexican grocery store. She understood our concept and shared crates with us. These were perfect for storing loose parts in our outdoor classroom. 
Nature is usually free! Our site is on ten acres of woods. Wood abounds! These logs happened to be stacked in the area we used for our outdoor classroom--instant climbing feature! We also have been able to make tree cookies, gather pinecones and sweet gum balls, make log seats, etc. 
Nature naturally recycles itself. Natural items can be used for a time and then put out to compost when they no longer serve their purpose in the outdoor classroom. Watch for a picture below with items in crates. A neighbor was getting rid of rough tree cookies, my children collected acorns, my son and I picked up downed pine branches, and children at the nature center gathered sticks to fill our crates. Nature is free! Check with tree trimming places for materials. I also have stopped numerous times when I see downed trees. I knock on the door, let them know what I'm trying to do, and usually am allowed to take whatever I can fit in my van. I put adds in our local free newspaper and let people know what we need! They will often collect and deliver even! 
As we looked at what we would like in our outdoor classroom, I knew we couldn't afford all the things we wanted. We received an initial grant from NAI Region 4. In the grant, I explained our vision and what we were trying to do. We couldn't afford the whole Nature Explore set up, but we did select things to buy that would really make an impact in our outdoor area. We bought large pieces of outdoor fabric (though have since also added tulle to this crate and it seems to be doing fine), small garden tools, buckets (love Nature Explore buckets), and materials for our clear easel. Find the items you really want and can't find a less expensive way to make or procure them. As you write grants and look for other funding, use these funds for those items you cannot get otherwise. 
We have a great local store called ReStore--it's part of Habitat for Humanity. People donate all kinds of building and other supplies to sell there. I like to browse it once a quarter or so to see what I can find. I have found these garden mirrors for 2 for $5 when they are on sale. I have even called and asked for when they will be on sale so I can get a better deal. I couldn't afford a large entryway; however, I could afford two garden mirrors on posts that I got on sale at our local big box store. They make an impact and say welcome to our area. For our initial certification, I had found poles to post in the ground with a laminated color picture to name our area, and scarves tied around. This was an okay temporary fix, but I'm much happier with our $10 upgrade. We also put these mirrors in our mud kitchen area, as "windows". We are also considering adding them to our wildflower and weaving area for additional artistic elements. One person mentioned the ground was warm from the reflection of the mirrors. I didn't see any warnings on these, but it is something to watch and be aware of. 
I have also found domed acrylic mirrors. I put these out in the yard to see our muddy faces on International Mud Day or to watch the trees above our head swaying in the wind. It's great to see children interact with these. I take these in when we are not in the area. I found marine planks for $2/board, too. These made a little table in our mud area and my children use them as a loose part in our log area at home. Get to know the people at the store and let them know what you are trying to do--they may alert you of other materials you hadn't thought of before. 
I have also seen utility spools and large tubes sitting outside industry spot in our area. I have stopped by and asked if they were okay to repurpose in our area. I check to make sure they didn't have exposure to various chemicals and look for smooth edges and safety. Are there places in your area that might have items to repurpose? I also found large cardboard flowers after a Vacation Bible School that were going to be discarded. We easily stapled these to the back of our building for some color and added whimsy! Thanks Bristol United Methodist Church for helping with these! They even helped drive them over.
Building stores, salvage shops, and flea markets may be in your area. Browse home improvement stores. What low cost options do they have for engaging play? What is their giving policy? What resources might you check out in your area? 
I am always on the hunt for other ideas that are low cost. We visited Kalamazoo Nature Center's outdoor playscape and noticed this gate made out of sticks. It seemed simple and inexpensive. We used this concept to carve out a dirt digging area in our outdoor classroom. One guiding principle is to have clearly defined areas. This is an inexpensive way to make a clearly defined area. A couple of cub scout groups came in and put in the wooden stakes (about $20) and gathered the numerous sticks from the woods and yard to fill in our "bird's nest". It makes a great place to dig in the dirt. 
Check out Pinterest boards, blogs, and other certified Nature Explore Classrooms for ideas on what you might like in your area. 
While allowing for easily accessed storage is one of the guiding principles for Nature Explore Outdoor Classrooms, we don't always want to leave some of more expensive items outside beyond our open hours. We have items in crates for the various areas that can easily be secured indoors and taken outdoors. We have a basket of scarves and small musical instruments to add to our basic musical area. We also did a mobile concept like this for my friend's music and movement area. In the picture below, you can see crates outside--these items I am comfortable leaving outside. 
Other baskets we might have include a fort building kit. We have an area under a tree with lots of long sticks for building. We started our fort building kit from a Christmas present. My brother and sister-in-law gave the boys a set of recycled sheets, ropes, and clothespins. This was a great place to start. We have added more of everything to this to accommodate larger groups. The picture above is from when we set up shop in front of our local library during a program, called Nature Play! It was fun to have a mobile nature spot that could be taken many places. 
My final tip is to let others know what you are trying to create. It takes time to explain it and let others see the vision, but it's worth it in gathering resources and finding friends and groups to help with the process. As you read above, this involved families, husbands, friends, service groups, and many more to pull together. It took a leader to see the vision and to help with the organization, with lots of help of other volunteers. I appreciate all the support in getting this done.  
I mentioned these crates in various comments above. This was all free! One person donated the crates (and came back with friends and did yard clean up for a total of 16 hours). She also filled up the garden boxes with worm castings. She has an awesome product through RAW Sustainable Living. As people get more involved, see children and families using the space, and understand the need for the areas, they will help! Point them to what you need done. I have been sharing my Pinterest boards lately as inspiration for others who want to contribute to this project. I cannot do all the projects that I would love to see happen, but families and groups can adopt a spot and make it an even more engaging area for our community. 
Another family often brings their 4 girls into the nature center. They are working on a fairy garden spot deep in the woods. This is different than one of the guiding Nature Explore principles of having areas visible at all times. However, we wanted this spot to be a little more magical. Our intent is that it will be for older children who might not need as much supervision and for families that include an adult with them so there will be supervision there. Their family owns a custom audio company, Dynamic Audio Design, for cars. They have  access to tools, products, and resources that will add to this space. Watch for the Fairy Wings and Wild Things event on May 7 to launch this magical space, including a fairy trail in the woods. 
We have another mom in our nature preschool group that has been using nap time for various projects that need done. She is good at free cycling (I think I need to give her a list of what we need!--put those wish lists on the Internet and let people know what you might need) and had access to lots of yarn and fabric. She has made banners (crocheted even!) to help spruce up our area and add whimsy. She cut pieces of fabric that will be perfect for capes and outdoor building. Other moms and interested groups see the potential and vision of this Outdoor Classroom area and are stepping up to offer time, talents, and resources to help make this happen! I offer my skills and time as a volunteer as well--I am not paid for pulling this area together, but want to see a natural play space for my children and the community. I started volunteering at the nature center through the Indiana Master Naturalist program. 
In our Loose Parts=Imagination + Creativity workshop, Chris Whitmire from the Early Learning Center in Granger and I developed a worksheet and process for helping find resources in gathering loose parts for our spaces. For me, loose parts need to be a part of any Outdoor Classroom setting. I'd love to see more at playgrounds as well. The principles in our planning sheets for Loose Parts would also work well as you develop your Outdoor Classroom spaces. Also, you might want to check out this post on Natural Playgrounds for additional resources, ideas, and inspiration. Indiana Children & Nature Network also has valuable resources on Natural Play Areas. 
If you would like to donate time, energy, resources, or money to the project at Woodlawn Nature Center, please click here for volunteer opportunities or here for our wish list. Additional monetary funds are needed for ongoing operating costs at the nature center. Any amount is helpful!

Friday, February 19, 2016

The Power of Loose Parts Play


A Maple Syrup sensory bin at Kalamazoo Nature Center.
Have you ever wondered why children are fascinated by the box their new toy arrives in or is always trying to pick up a stick? The theory of Loose Parts by Simon Nicholson explains it well. He stated, “In any environment, both the degree of inventiveness and creativity, and the possibility of discovery, are directly proportional to the number and kinds of variables in it.” In a child’s mind, all those loose bits of string, sticks, and other “treasures” are really components for building and creating.
            Last year, my youngest son had a simple request for his birthday present: “Sticks, lots of sticks!” He knew and recognized the power of a simple loose part that is actually included in the Toy Hall of Fame. To a child, a stick can be a sword, a writing utensil, a fence post, a fairy wand, or more. The possibilities are endless. Even adults get into the power of Loose Parts Play. A couple of years ago, I was able to work alongside Patrick Dougherty who never outgrew his affinity for sticks. Today, he makes twig sculptures all over the world, using a whimsical approach in outdoor spaces. Just visit Fernwood Botanical Gardens and Nature Preserve to see Take Five! and explore how he has taken the theory of Loose Parts to the next level!
A Loose Parts Spider!
            I experience the benefits on a regular basis as I host various activities and learning experiences at Woodlawn Nature Center. We set up a Loose Parts Play area that contains shelves of sticks, pinecones, tiles, fabric, blocks, acorn caps, milkweed pods, and more. Children (and sometimes adults!) use these various pieces to make creations that explore the natural world and help them make sense of what they are learning.
            One girl had attended our Nature Preschool group on a Monday morning. Our topic was birds. She returned on Friday, visiting the Loose Parts Play Area. In her normal play, she built an anatomically correct bird out tree cookies, pinecones, pipe cleaners, and sweet gum balls. She was able to tell us about the beak, talons, wings, and body parts. In her normal play, she was making sense of what she was learning and demonstrating her understanding of the natural world around her through Loose Parts Play.
            Additionally, the Nature Explore nationally certified classroom at Woodlawn Nature Center has areas to explore Loose Parts Play. Whether children are dragging long branches to make their own Dougherty inspired twig sculpture, working together to lift a tree cookie to build a ramp, or creating a fort out of long pieces of outdoor fabric, children are able to use loose parts to create and build. This builds and strengthens their connection to nature.
Educators work together to build a vehicle
with loose parts at the
Indiana Early Childhood Convention

            Benefits of Loose Parts Play abound. Besides the imagination and creativity, loose parts play promotes cooperation, experiences using all the senses, concrete examples of abstract concepts, developmentally appropriate practices, ownership of one’s learning, inclusive play, and moving, learning, and fun! This is learning!
            Loose Parts Play generally is open-ended. Items can be combined in many different ways. There are no specific directions. The participants determine how the materials will be used. The materials can be adapted in many ways. A Sweet Gum ball may be a wheel on a car one minute, or the eye of a bird the next minute.  Richard Louv suggested, “Nature is imperfectly perfect, filled with loose parts and possibilities, with mud and dust, nettles and sky, transcendent hands-on moments and skinned knees.”
            What are the components of Loose Parts? Almost anything! We typically use a combination of natural materials and found objects or discards from industry. Woodlawn Nature Center is always looking for donations of items that might fit into these categories to help fulfill its mission of connecting others to nature. Some examples include pinecones, sticks, tree cookies, wooden or wool balls, sand, water, fabric, clay, picture frames, twine, nuts, mulch, stones, straw bales, leaves, boxes, and blocks. As I shared the theory of Loose Parts Play with local Indiana Master Naturalists, many remarked this is just how they used to play as children. As electronics and overscheduled lives have crept into our world, our children do not have as many opportunities for natural free play like this.
            Loose Parts Play can be set up as a station, included in the classroom as a writing prompt, used as an impromptu activity on the trail, as a pretest or assessment of learning, as nature art, in a sensory bin, and more! The possibilities are endless.
Want to learn more about Loose Parts Play? Check out the Facebook Group Loose Parts Play for ideas and suggestions. Educators and parents from around the world share how they are using Loose Parts. I will also present “Loose Parts Play for Parents” at Woodlawn Nature Center on February 26, 2016, at 6:30 pm. The cost is $3/person, with proceeds going directly to operating costs of the Center. The parent workshop will explore the theory of Loose Parts Play, explaining why children often seem more intrigued with the box than the toys we buy them, looking at open-ended toy options, and touching on how to use Loose Parts effectively in the home environment. Reservations are appreciated by emailing woodlawnnaturecenteronline@gmail.com.

Additionally, watch for upcoming programs at Woodlawn Nature Center, such as Nature Inspired Tinkering in April, Fairy Wings and Wild Things in May, Pop-Up Adventure Play and International Mud Day in June, and our regularly scheduled nature play days! See Loose Parts Quotes and Loose Parts Worksheets on the blog! 

Sunday, February 14, 2016

Valentine's Day Nature Activities


We pulled some nature activities together to share at our local nature center, Woodlawn Nature Center. We had a basket of pine cones, sticks, and sweet gum balls, adding pipe cleaners, pom poms, and valentine colored yarns. The pom poms and pipe cleaners are easy for little hands to coax into the pinecones. It helps with exploring seeds and seed dispersal in pine cones as well! 

 
Really, this activity could be adapted for ANY holiday--just switch out the colors of the materials to match the holiday! 

It was neat to see the older kids get into it, as they brought a different level of experimentation to the loose parts. One made a bag full of acorns from a recycled mesh bag. He's planning an experiment to see how long it takes the birds and squirrels to eat them. 
 

We had a Valentine's book collection. To be honest, there is an opportunity for nature themed Valentine's books. I'm not sure what that might look like, but it's always nice to have themed books! I have had this "Love Bugs" pop up book forever, but it's not really science based.

We also had a station of hearts in nature. I have a set of heart shaped nature pictures from Nature Explore; however, I don't see them online. You could make some of your own pictures or from images found online. We included some nature "shape" activities to go with this center.  I like that the backs of the cards have a variety of questions, activities, movements, etc. to extend the learning on the cards. These could be brought along on a hike, staged to find on a hike, and/or used to look at/experience once a week. 


I've loved this little book, Discovering Nature's Alphabet. (aft link) We looked at the simple lines in nature the form letters/shapes.

We had another table full of Valentine's stuff, such as stickers, paper, cut outs, etc. to make your own Valentine. 

On the light table there was an invitation with tissue paper, laminated heart doilies, laminated tissue hearts, etc. 


We also worked on fine motor skills, making bird feeders with cheerios on pipe cleaners. With a little adult help, it was easy to make a heart shape to put on a tree. Other years, we have cut out cardboard hearts, spread peanut butter on them, rolled in bird seed, and hung from a tree. It was fun and easy to put this together and less messy than the peanut butter!

Part of the fun is finding a good spot to leave it in the woods! 


I think what we enjoyed most was a little heart hike. There are MANY variations of how this might be done. I laminated a variety of hearts--doilies, tissue paper, etc. I just used what I had in my Valentines box. I laminated as I wanted them to be durable over several uses and wanted to use them outside where I knew it might be snowy/wet. Here are a few ideas on using them. How might you use them? 

  • Find things you love in nature on your walk. Take a picture with the heart to document what you loved. If desired, make a book out of the experience. This would be good with an early childhood class, capturing the children's words to document the experience and caption the photo.
  • Leave a trail of hearts for others to find! Let others find the hearts on the path (schedule with another group). Leave the hearts near interesting items that they may enjoy as well. 
  • Hide the hearts before heading out to find them with your little ones. 
  • Find items in nature or outside that match the colors of the hearts. 


Happy Valentine's Day! Need more ideas? Check out ideas we've pinned on Pinterest for Valentine's Day for lots of inspiration!


Sunday, January 24, 2016

Woodpecker Wham! Activities

I did a series of programs with different audiences over the weekend on Woodpeckers at Woodlawn Nature Center. Can you believe there is not much out there as far as teaching aids to use with woodpeckers? Believe me, I hunted to find what I did! I also created a few things, too. If you use any of these ideas, feel free to let us know!

I have mentioned the book Woodpecker Wham! by April Pulley Sayre various times in the past. She has great nature books for children! I was inspired by this book to create these experiences. It was great when she gave us a shout out on Facebook as "creative and passionate" people make her book come to life. See my review of the book here and a related blog post about Woodpeckers in our area. This gives a good overview and links to resources with more information about woodpeckers. I reviewed these to make the woodpecker clues and to have information to share at the presentations.

I hosted a few programs:

  • Nature Play--activities available if people wanted to use them, I read the book if someone is interested and talked about woodpeckers while children played and created.
  • Woodpeckers in Winter--developed a PowerPoint of the woodpeckers in our area, sharing information on identification, behaviors in winter, how designers look at woodpeckers for inventions, attracting woodpeckers to yards, deterrents from woodpecker damage, and quizzing the participants with the use of woodpecker clues.
  • Family Nature Club--read the book, short run through the PowerPoint to identify woodpeckers in our area, guided hike looking for signs of woodpeckers, good woodpecker habitat, brought puppets and clues to test woodpecker knowledge on our hike. Inside once again, stations were set up to reinforce what we learned about woodpeckers. 

Printable Resources I Created:
Woodpecker Puppets or Matching Cards
Woodpecker Clues

Here are the stations I set up:

Puppets and Matching Cards--I printed out (see printable above) two sets of the woodpeckers in our area, cutting them out and laminating. One set was taped to paint sticks for puppets. The others were for matching with our woodpecker clues (see printable above). We found the woodpeckers in the book, used puppets during the PowerPoint presentation to match with the clues, took the puppets on our hike to reinforce the concepts, and used the puppets for PLAY! Play is always an important concept for learning. See a related post on using play to learn about animals here. The woodpeckers even found wood for drilling.


Build a Woodpecker--Provide "loose parts" to build woodpeckers. I brought in Magformers (a favorite in our house--actually my husband's toy!) and a basket full of shells, nuts, golf tees, and other natural materials. Can you see a woodpecker in these examples? We used the puppets as examples, so we could pay attention to the shape, coloring, etc. This could be much more complex if desired. What I love about loose parts play? No artwork to store or recycle! See my post on resources and quotes about Loose Parts Play. I even have a Loose Parts Play Facebook group if you'd like to connect with others around the world using Loose Parts Play for learning. 


Fold a Woodpecker--I found an origami guide sheet to make woodpeckers! It's pretty nondescript, but offers another way to connect to woodpeckers. We build many skills by following the directions, making precise folds, etc. I used to teach elementary school in Japan--glad we could make cross cultural connections, too. 


Reading and Coloring--I had Woodpecker Wham! and Vulture View (by the same author) out on a table with coloring sheets, information sheets about woodpeckers from Birds & Blooms magazine in sheet protectors, a quiz from B&B, a poem about woodpeckers, and bird observation journal sheets.


Craft a Bird--A volunteer (thanks, Annie!) had an idea to make paper birds like this. She cut out the various pieces after creating a pattern, figured out feet with twisty ties (cool idea!), and


Extension Ideas:
  • Build a woodpecker nesting box
  • Make homemade suet to attract woodpeckers
  • Use props (such as goggles, a bill, etc.) to show unique adaptations of woodpeckers
  • Create action cards from the various woodpecker action in the book to act out while on a hike or during story time
  • Find a readers theater to share about woodpeckers
  • Read traditional stories about woodpeckers, like Hiawatha
  • Share videos of woodpeckers in action--maybe have tablets with some preloaded to view
  • Use the Identiflyer (aft link) or an app to learn the calls of different woodpeckers
  • Print large pictures of the birds, using yarn to create a "sign" of each one. Place the picture on the child's back. Play 20 questions around the room, asking others questions to figure out the birds. This can also be done with the animals and info sheets in folders to discuss. 


Here are a few shots from our guided hike. We had a great family of girls who are always outside and a new family of boys that obviously have a lot of experience in nature. I was glad I could still share a few things to help extend their experience, too. :-) We found good habitat for woodpeckers, talked about what they eat, and the kids actually found 2 woodpeckers--a downy and a red-bellied! That was neat to see them in action! 


It was a beautiful day to be outside and we could have stayed outside for longer!


It was neat to see the kids building woodpeckers and such after we came back inside after the hike. They were really getting into their building, creating woodpeckers (left), complicated bird houses with several levels (picture on the right), and more! 


They had lots of fun!